
Intro
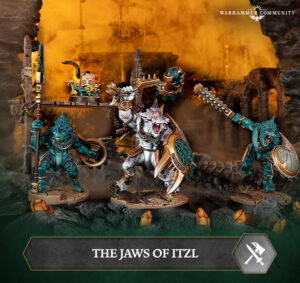
Odd to be starting off my second edition meta analysis articles with a warband that is not Kainan’s Reapers, but here we are! I actually wrote up an article for Kainan after AdeptiCon, but given that my build was quickly made invalid by the summer rules updates due to the FAR and the since-fixed change to the token placement rules, I had to scrap that article (we’ll get back to it later). In any case, what will not be so surprising is the topic of this article, which is the Jaws of Itzl, the warband I elected to take to both WTC and WCW this year. We put them in the A-Tier back in Embergard, and I see no compelling reason for that to change in Spitewood.
Playstyle and Deckbuilding Considerations
Strike Warband?
Jaws are often, in my opinion, misrepresented as simply a Strike warband. I think there’s a lot more Flex value here than most people recognize. In fact, when checking in for Underworlds at WCW, Nick Bayton asked me what I was playing and offered an “ah, came to the world championships to roll dice, eh?” I could only shrug in response because, while Jaws do roll dice for a lot of different things, I didn’t feel like I was really taking something that was more dice-dependent than the field. Yes, there are dice and probabilities involved with some of what the warband has on offer, but you could make that argument for a lot of different warbands. For example, I would say Wurmspat have about as much dice dependence, yet they won the whole thing! I’ll start with the bits that are “dicey” about the warband, but I want to emphasize that the core of what’s on offer here can represent a powerful flex gameplan even in cases where dice are not particularly cooperative.
Predatory Fighters

The most common misconception I see with this warband is people thinking that they need to hit Predatory Fighters to be successful with them. Folks will pursue offbeat deck pairings to seek out extra Save dice or look at a meta as unfavorable for the Jaws if there is too much accuracy simply because they don’t think they’ll be able to hit a ping back. While they are not wrong about the odds of landing the ping in these situations, the issue here is not the math, but the perception. The question is often “well, most pairings only have one ping card, so how am I supposed to get all my saurus warriors inspired without Predatory Fighters?” The answer is simply that, more often than not, you don’t have to get them all inspired, you just have to get the right one inspired (preferably as early as possible). While this ability can get you there in the best of scenarios, consider a basic 3S or 2H melee attack. These attacks have 48 and 50% chances of success against your 1S Save, respectively. In the ~50% of cases where those attacks fail, you have a 33% chance of rolling a shield. This makes for a 16.7% chance to use Predatory Fighters, which is already quite low, but your opponent will almost certainly have more ways to augment their accuracy (cleave, flanked, extra dice, re-rolls, etc.) than you have to augment your defensive capability early in the game, making the odds even lower in practice. Think about it this way: if you had a ploy in your deck that only worked 16.7% of the time (or less), even if you could pull it out of your discard pile and use it again, would you make that a core point of your gameplan? Of course not. We should view Predatory Fighters the same way. If it goes off, well that’s great for me, I’ve gotten a ping and an inspire, free of charge. If not, well I wasn’t factoring it into my own gameplan anyway. Just play as if that space on your warscroll is blank (but don’t forget to use it when the condition is met) and let your opponent worry about it and factor it into their play lines. Then you can only be pleasantly surprised when it happens while still enjoying the benefits from the rest of what is a very good warscroll.
Savage Mauling

If you are interested in playing Jaws competitively, this is the “dicey” ability you need to be most concerned with. Do yourself a favor and memorize the odds table, because this math is going to dictate your decision on when to actually go for that bite. I’ve tracked below the odds of getting a certain amount of damage (or more) based on how many dice we roll. I of course only went up to 5 because well, that’s as high as you can go unless they ever print a second +Health upgrade that’s not Great Fortitude.

In general, the best use of the ability is as a finisher due to getting the refresh and being able to remove a model from the table during a power step, which typically means you are only sticking to the leftmost column and attempting it when they have 1 health remaining. However, this all comes down to matchup and game state. It’s obviously easier to set up kills against hordes than against elite fighters, but sometimes the inspire is more important than the kill. For example, if I’m facing something like Wurmspat, I am pretty ok with just getting some damage on one of them and inspiring Kro-Jax so that I can more consistently threaten a 2-shot on them with my 3-Damage attack (especially if they haven’t damaged him yet, because inspiration will make him harder to hit and therefore harder for Wurmspat to inspire). Additionally, sometimes a game has not started well and you need Savage Mauling to make a big play for you, so you shoot for the lower odds somewhere on the table, as the situation dictates. While dice will let you down at times, I again find it helpful here to recontextualize the ability as something else. We do this kind of math all the time when considering attack odds and should do the same here. Everything in this game is balanced on risk-reward. In this case, the risk is more constant in that the only thing you are risking is whether or not you will have access to the ability later in the game. Therefore, I tend to err on the side of using it more towards peak reward rather than peak odds of success. That’s not to say I’d like to throw it out there when I only have one die available or something else low odds, but situations where I can get an early kill and inspire are examples of where I’ll risk an approximate 50-50 just for the massive advantage that will give me if it happens.
One other thing to consider here is simply how the ability functions. If I have already used my Obstinate, odds are good that the Savage Mauling opportunity I have now is less likely to materialize later in the game when people can more readily drive me back. Similarly, a fighter that has taken 2 damage already is not likely to get a much better roll than that later in the game unless I can heal them and/or hand them Great Fortitude. Lastly, noting that you can only use the ability without a charge token is a very important consideration. The fewer charges you make, the more likely it is you are able to manufacture use of the ability. This, in conjunction with the other abilities on the warscroll, is the heart of my rationale for treating the warband as Flex rather than Strike. If you can force your opponent to come to you via the threat of positional scoring (and/or denying their scoring), you’ll be able to set up a similar number of attacks to what you would access via charging while still keeping the option of Savage Mauling more accessible.
Obstinate and Instinctual Control


The final nails in the coffin for me playstyle-wise are Obstinate and Instinctual Control. While not being driven back for a round has obvious synergy with Savage Mauling, the more important impact it has is on scoring, particularly scoring which is focused on standing in a particular spot (typically on a feature token). Whether you want to hold a treasure token, delve consistently, prevent your opponent from standing on a token, etc., the amount of board control this grants you is incredible. For example, when facing off against players using Pillage and Plunder, you should know by now that they want you to not hold treasure tokens for Strip the Realm and want to have access to 3 tokens themselves for scoring cards such as Broken Prospects or Torn Landscape. Obstinate on a contested token will instantly force your opponent to either try to kill that fighter (which can unlock all sorts of nasty ping and inspiration options for you) or avoid them and inhibit their ability to score their objectives. Unless they are capable of one-shotting you (very few fighters can), either option is a win, so there is not a “good” choice for them to make. This is especially the case in matchups where you know they lack access to a disruption effect. Most common pairings only have access to one such card (Lure of Battle, Confusion, Violent Blast, etc.), and some, like PnP x DS, don’t have access to any. If you know they don’t have or have already used their power card option here, you can basically just bully them with an Obstinate saurus if you can correctly identify the most annoying/useful position for them to stand.
Couple this with Instinctual Control and it is not hard to imagine situations where you are able to maintain decent feature token control. At absolutely base level, charging onto one token and moving the snakes onto another, then using Obstinate on the fighter that charged can satisfy positioning requirements for a variety of different surge and end phase scoring we have in the game right now. While you obviously have to be particularly mindful of cards like Trapped Cache that can kill your snakes, I think it is fair to say that there are more ways to use these abilities to support a Flex playstyle than a Strike one. Given that they are the most consistently dependable options on your warscroll, why not lean into that with our deck build?
Current Deck

The Build
While BA x PnP is nothing novel from a deck building perspective, I really have not seen many Jaws players select it as an option. For me, it has everything the warband needs (probably everything most warbands need, to be honest). There is enough passive scoring to force your opponent to step up and engage, a supremely consistent ping card to yield an early inspiration (the consistency later game is less important when I benefit much more from an early inspire than a late one), power card support to optimize mobility/damage/accuracy/survivability, and pushes plus a teleport to set up non-charge attacks and/or Savage Mauling opportunities.
Objectives – Surges
Share the Load is pretty much the poster child of what the pairing is trying to do, as you can score it mostly on-demand if the snakes are alive or simply leverage Obstinate and/or guard tech to set up situations where an activation of moving one fighter onto one token will result in 1 glory. Everything else essentially flows naturally from there, as is the case for most PnP decks (Delving for Wealth, in particular). Get Stuck In has the inherent weirdness into aggro matchups where they have invaded your territory, but is mostly automatic. Critical Effort is basically inevitable. The myriad of Obstinate/push/teleport tech often makes Hostile Takeover doable even in the first round, but will also happen eventually. Aggressive Claimant is the only real weak point here, but PnP naturally encourages people to stand on treasure tokens anyway. Even better if you can encourage them to stand in neutral territory while doing so.
Objectives – End Phases
Because the restriction to Claim the Prize has forced us to slot in Aggressive Claimant, I find it is generally preferable to play only 6 end phases rather than the traditional 7 which are enabled by the synergistic scoring of PnP. In this case, I would much rather consistently see my whole deck than augment my ceiling by 1 glory and occasionally get myself stuck with surges too far down towards the bottom. The 1-glory scores here are mostly free, so even if everything else goes totally awry for you, I’d say you’ve got 8 glory in the deck between the surges and end phases which are basically unstoppable during normal game flow, if you can draw through the deck. After that, you have to play for the other 8 (Torn Landscape, Broken Prospects, Strip the Realm, and Aggressive Claimant), but that can be said of anyone using PnP in their pairing.
Ploys
The ploys are pretty much standard fare for this pairing. Damage, accuracy, pushes, and heals don’t really need me to elaborate much on why they are good, so I’ll just cover the final two cards, which are Explosive Charges and Shields Up! In addition to both of these cards working to consistently proc Canny Sapper (which can actually be a bit of an issue in the pairing at times given that you have 3 surge ploys) without really committing any resources, both are useful for the warband in their own right. The extra hex of movement while charging is extremely valuable given the warband’s low base speed, but the card also has the nice side effect of canceling out your opponent’s Explosive Charges or an annoying card like Honed Reflexes. Meanwhile, Shields Up! essentially gives you a second use of Obstinate, in addition to the slight defensive success rate bump. Great for trying to deny Outmuscle or for setting up non-charge attacks/Savage Mauling.
Upgrades
Upgrades are also pretty self-explanatory for the pairing. Accuracy upgrades plus double grievous is great for making sure you can kill plenty of whatever you face. In a world with lots of Deadly Synergy (and even before its release), I think Brawler is basically nonnegotiable. Duellist and Canny Sapper help with the whole “attack without charging” thing. Impossibly Quick helps not only your survivability, but potential Predatory Fighters odds.
Notable Omissions/Potential Inclusions
As mentioned earlier, Aggressive Claimant is probably weak link in the surges, but your other options are not particularly inspiring. You could potentially play for Strong Start or Careful Survey, but I wouldn’t say that either of those are more than a lateral move. The only end phase considerations you might have are your final 1-glory slot. I tend to like Keep Choppin’ the most, but Fields of Blood is generally better in the late game. Lost in the Depths is plenty doable with some intentionality in your positioning throughout the round, but the warband is slow enough that sometimes getting all bunched up is unavoidable. You could add one of these two as a 13th objective but, as I mentioned earlier, I’m not sure the extra glory is worth the potential disruption of your deck sequencing.
Regarding the ploys, I’d love to fit in Wings of War somewhere, but it is hard to clear space for it, particularly as I had noted that you can already struggle to proc Canny Sapper at times. If you want to increase the ceiling of the deck while decreasing its consistency, I think Scream of Anger is very intriguing as a Shields Up! replacement. Being able to charge, remove token for 2 damage, then Savage Mauling could make for a very potent finisher and/or surprise for your opponent. Of course, this can be difficult to do late in the game when you are already damaged and also significantly shifts the math in terms of your opponent being able to claim your kill bounty, so I don’t know if it is ultimately worth it.
I’d love to fit Great Speed or Sharpened Points into the deck, but I defy you to tell me which upgrade to cut for either of them, and I’m not running 10/11 with Canny Sapper in the deck and no card draw abilities.
Board, Token, and Fighter Placement
Boards
While I don’t necessarily agree with the ruling to prevent use of Aqua Ghyranis tokens on Embergard boards, I have to say that this generally benefitted me at Worlds. While I was not often outscored on AG in games which included them, having fewer bodies than many of your opponents and needing to interact specifically with treasure/cover tokens for Broken Prospects, Torn Landscape, and Strip the Realm mitigates your ability to play for the AG when compared to hordes and/or more aggro builds. The same applies for waystone hexes, as you generally need to use bodies standing on tokens and delving instead. For as long as this rule applies. I would say that means you want to play on one of the Embergard boards, usually on a “fives” alignment to compensate for your slower movement speed, unless you are facing a scary Strike warband that’s planning to jump into your territory. If you must play on a Spitewood board, you probably would prefer not to use the one with the central stagger hex, as it means you have one less landing spot for Canny Sapper (even if it is very centrally located).
Feature Tokens
You almost exclusively want to be playing on 2-1-2 board setups, when you can help it. This will mean you have plenty of access to 3 tokens, and you can usually fight for the contested one better than most of your opponents thanks to your bulk, damage output, and Obstinate. Having one token in neutral makes it hard for your opponent to disrupt Desolate Homeland while also giving them further encouragement to stand in neutral territory to facilitate Aggressive Claimant. Besides these, the only other strong consideration is making sure you have will have a spot to deploy your snakes where they can reach more than one token via move action. In PnP mirrors, it is also important that this starting hex not be adjacent to any treasure tokens so that you don’t just immediately die to Trapped Cache.
Fighters
While So-Kar is a perfectly solid fighter in his own right, Ro-Tak and Kro-Jax are generally the more valuable fighters, he usually gets deployed in the frontmost hex I want to use in the matchup (exact location depending on the extent to which I am the beatdown vs. my opponent). Having Commanding Stride in the deck can easily facilitate mid-to-backline placement of your leader without having to worry too much, while you want Ro-Tak threatening a critical feature token with his Range 2 (sometimes even starting adjacent to it so that he can still threaten even after being driven back). I already kind of covered the snakes before, but yea, make sure they can reach a couple of tokens (one token is fine if greeding for 2 would mean they are overexposed against an accurate opponent) and can’t immediately die to Trapped Cache on deployment. If the board is particularly lopsided on with feature tokens or there is a particular side I want to avoid (like with Snirk), I don’t mind clustering up on a flank either.
Testing
I played a version of this deck at WTC 2025 and, while we had a bit more control over the matchups there, did manage to pilot it to 4-0-1 on a 9-3-1 game record (yes, we did hit a hard draw in one of our games). Since that version was more specialized for facing off against hordes, I did rework it for WCW 2025 into the version shown above, but the core gameplay was functionally the same. At Worlds, I finished 7-3 overall for the event with a 15-6 game record. Even if we count the WTC draw as a loss, that is a combined 75% win rate over 32 games against some of the best competition in the world. While I’d prefer a larger sample size, I think the standard of competition that the warband and deck were tested against compensates for the relatively low number of games played. I promise you that the deck works if you follow the path it lays out for you, that will just mean often forsaking the misdirection of playing Jaws like a Strike warband.
Gameplay Tips
In addition to what I’ve already covered, I’d like to highlight some of the keys to playing the deck successfully:
- Delve first, other power step stuff later: There’s no point in dropping your Obstinate just to get yanked off a token by Lure of Battle or something. You don’t have as many bodies or as much movement economy as a warband like Gitz, so you need to make sure you’re securing delves for things like Against the Odds or Broken Prospects each time you land on a token in matchups where you know you could hit some disruption tech. This applies to using the snakes as well. On top of only getting the one move reaction per round, not delving immediately with them the second they land on a treasure token will often spell death in the PnP mirror via Trapped Cache.
- Bully people with Obstinate: This goes hand-in-hand with our prior tip, but you should be pretty well aware of the power step disruption cards which exist in the game. If you know your opponent has already used theirs or that their deck pairing/warscroll does not have access to one, abuse that knowledge. 5 Health is a tough nut to crack, particularly with two heals and Great Fortitude in the deck. Every attack your opponent makes carries an inherent risk of you popping a Predatory Fighters. Even if they hit, they’re putting damage on you which can be used to fuel Savage Mauling and inspire one of your other fighters. While not always the correct opening play, moving So-Kar onto the contested third treasure/cover token and using Obstinate is an extraordinarily powerful and rude play line, particularly in cases where you drew Trapped Cache into your opening hand. It’s an opening move I’ve done quite often myself.
- Be aggressive with Savage Mauling: Sometimes the best you’re going to get in a game is an attempt at a 2-dice Savage Mauling. While you won’t always know that to 100% be the case early in the game, there are games where I’ve tried to hold it for a later, “better” time that just never came. The only thing worse than “wasting” the ability on low odds of success is reaching the end of the game and realizing you never actually used it. Just don’t confuse being aggressive with being careless. There still needs to be some notable upside when you go for it (presumably an inspire during your opponent’s power step), and you should have a plan for exactly what you’re going to do if it lands.
- Don’t charge just because you can: We covered this a bit earlier, but charging with a fighter locks you out of using Savage Mauling with them for the entire round, allowing your opponent to gang up on them with impunity. Keep that threat and the threat of their potential re-activation available and you’ll find that things go a lot smoother. With the snakes around, you’re not charging out anyway, so there’s nothing wrong with playing it slow and taking a move or focus action in your first turn if there’s nothing immediately obvious to do otherwise. Early focus, in particular, can be really valuable to fish for Trapped Cache if you didn’t get it in your opening hand. If the board state is fine for your scoring, going on guard is a perfectly legitimate choice as well, particularly if it helps deny your opponent’s scoring of something like Outmuscle or Pinned!
- Hold your heals: You don’t always need to heal off damage immediately just because you’ve taken it. Damage is a resource with which to feed Savage Mauling, so removing it prematurely can leave you in situations where you rob yourself of potential output. Certainly, you need to be mindful of “surprise” cards like Twist the Knife or Improvised Attack and pre-empt your fighter’s death with a heal, but you should be able to identify the situations in which your fighter is vulnerable to dying and those in which they are not. Sure, against Wurmspat or something, you want to try and slow their inspiration if you can, but the general game flow you are likely to encounter will reward you for waiting. Holding heals can also catch folks out in cases where they want to score cards like Fields of Blood or Wreckers.
Matchup Spread
Overall, I don’t think that this warband has any totally atrocious matchups, so you’ll note that I have not given anything a worse score than 45:55. While some warbands can pose unique challenges, your scoring is consistent enough that you should be competitive in all but the very low end of dice/draw outlier games if you are not making mistakes and are cognizant of your opponent’s scoring/abilities. Between Ro-Tak and Kro-Jax, an early inspire will also give you an absolutely devastating fighter capable of dealing with whichever matchup you need to contend with.
Warbands with high base accuracy can pose a natural problem for you, as taking an accurate 2 damage, followed by an accurate 2 damage + grievous is a good way to skirt the best odds of Savage Mauling and Predatory Fighters to starve you of free damage/inspiration. In this camp, I’d like to highlight Soulraid and Mollog’s Mob, particularly considering that the latter is capable of laying down some serious damage to go along with his accuracy. For other more unique difficulties, Headsman’s Curse also have to luxury of picking their spots against you and, when the leader is inspired, have one of the few options to one-tap a lizard from full health. Lastly, while 3XD are not quite as strong as they once were, them winning the first roll-off of the game means you likely have to play entirely without use of your snakes, which can make several of the play lines in this deck difficult to pull off.
As for warbands which Jaws is well-suited to fighting, I think you are generally hoping to face off against hordes like Gitz and Grymwatch, as the constant threat of ping + Savage Mauling exists there. Getting the refresh even once can be game-winning in those matchups, particularly because you are doing it all in the power step. Meanwhile, inspired Ro-Tak is absolutely devastating to warbands with lots of 2-Health fighters, particularly once you get some accuracy and/or Duellist onto him. With the cards in this deck, one inspiration, and average dice, you should kill ~7 Gitz per game, even if you’re only making 10 attacks. There’s also relatively easy upside for 8 or all 9 if you go even a bit above average on dice or they let you have more attacks than that. You also just do well into PnP mirrors in general thanks to Obstinate and the fact that they will give you a hand with scoring Torn Landscape, so the prevalence of that deck in the meta is a further boon for the Jaws.
Conclusion
As I’ve said multiple times on the podcast, you can just feel the power baked into these guys while you’re playing them. I suppose I’ve made a bit of a name for myself as a B-tier warband enjoyer, and I think that is a fun and important part of the game, but sometimes it’s good to take that A-tier thing for a spin. I am still surprised at how generally underrepresented Jaws are in the meta, but maybe that is just a symptom of having so many warbands that are competitively viable at the moment. If Worlds is any indication, it seems like we are in for a pretty diverse meta going forward, and I think Jaws have a place towards the top of it.
Well, that’s all for this time. Let me know if you agree or disagree with my thoughts here, as well as if you’ve been playing any Jaws yourself! Until next time, we wish you the best of luck on YOUR (Instinctual) Path to Glory!