While reflecting on my experience playing at the Alberta Classic recently, I was thinking about the opportunities where I needed to make changes to play patterns due to cards my opponent was playing. Since the inception of the game, discussions had been around as to countering Denial or Alone in the Dark. I wanted to dig in, deck by deck to plot out what to think of when you’re up against a certain deck.
Initial Thoughts
There’s a balance between countering a specific scoring opportunity and disrupting the main gameplan of an opponent. Yes, you’ll know your opponent cares about tokens if they’re bringing Emberstone Sentinels or Pillage & Plunder. Same with smashing if they’ve got Blazing Assault or Reckless Fury. I’m not going to give advice of “knock them off tokens” or “don’t get hit”, as those may be the general moves you’ll take in such a match up anyway.
I’ve also focused on End Phase scoring for the purposes of this article. There are some surges that you can figure out how to counterplay (Too Close for Comfort comes to mind), but in general they’re going to get scored. But figuring out a way to cancel a couple glory and brick an objective card is the more important task.
Blazing Assault
Denial: With Blazing being centered by five one-glory cards and Annihilation, it’s really hard to find much counterplay against the deck. Countering Denial is available for you though. If your opponent is running this, it’s as simple as both surviving and positioning well. Being at one glory and counterable, it doesn’t see a great amount of play but it’s important to consider when you make your final moves of a round. Hey, being in your opponent’s territory would also prevent Get Stuck In!
Emberstone Sentinels
Iron Grasp: Obviously, the entire counterplay against this deck will involve knocking them off tokens. Or claiming them for yourself. Iron Grasp is one that I see as a good opportunity to change up positioning. You may let them take their tokens all in their territory but it’s likely best to be a bit more aggressive, making sure they can’t get either territory. Token placement at the start of the game becomes important too. Attempt to get the tokens spread in a 2-1-2 fashion between enemy, neutral and friendly territory.
Pillage and Plunder
Desolate Homeland: Make sure they have two tokens in their territory when placing them at the start of the game. Otherwise you’ve given up a free glory.
Strip the Realm: I’ve heard a lot about countering this card, as one of the only 3 glory cards in the game and with direct counterplay. In fact, I’ve heard of a number of people taking it out of decks because it’s being blocked too often. That being said, don’t get complacent. Unless you’re sure it’s not in the deck, do what you can. Stand on a token, make sure they can’t get this early because you didn’t position well. Flip their tokens back. Speaking of…
Torn Landscape: This is the one that I keep in my head during a matchup against Pillage. I’m always counting how many treasures are left on the field. You don’t want to be in a situation where they get the field down to one treasure left because flipping back to two won’t help to deny. Get on tokens early to prevent, fight over the ones already delved and stem the tide of cover.
Countdown to Cataclysm
Spread Havoc: Rip up your opponent’s copy of this card. It’s the only way. Set The Tempo does not encourage destroying your opponent’s game components.
Wreckers/Hounds of War: Grouping these together as they both care about multiple of your fighters being wounded. As much as there won’t be a ton of counterplay you can do to prevent being hit, make the attacks on un-wounded fighters harder by making them have to charge into support. And spend your heals to bring someone up to full.
Loaded For Bear: As scary as it is, jump right at the 2+ upgrade fighters and try to take them down. It may not always be feasible, but pay attention to how your opponent is deploying upgrades and the power cards left in hand.
Reckless Fury
Arena Mortis/Unrelenting Massacre: Simply put, don’t charge. Arena Mortis makes you focus on the territory the fighters are in, so running away may not be the best option. Denying 3 glory from Unrelenting Massacre just by taking a simple move action rather than baited into a charge. Pay attention in those last couple activations and don’t hand them 2, 3 or 5 glory!
Wrack and Ruin
Alone in the Dark: Obviously, this becomes harder in elite matchups and closer to the end of the game. There’s a good case to be made to not drive an enemy back, charge into support or turtle up. You might get caught by this in game one, but make sure you pay attention in the next two.
Stay Close: This is the card that inspired the article. I hadn’t really seen it around a lot, but it showed up in two decks I played against in the clash. I did get caught by it in both game ones, but after that, I looked at the board differently. I was working on how I could charge to edge hexes or drive charged fighters back into them. It was an interesting play pattern that I hadn’t considered as well as I should have. If your warband has archers, you can pretty easily make your charges into edge hexes and not lose much. Melee warbands do have a harder time with this.
Edge of the Knife
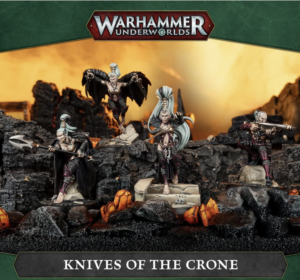
Trial of the Tempered: Pile the damage on one specific enemy fighter, as opposed to spreading it out! That’s what your opponent wants. Take them down one by one. Get your 3+ wound fighters farther back and if that heal comes up, top someone up to full again! I noticed the other day that 4 fighter warbands are usually strongest against this card. You’ve got to have 4 successful attacks against Knives of the Crone or Myari’s Purifiers to get this online. Spiteclaw’s Swarm also is resistant to Edge’s tricks.
Calm Before the Storm: A similar mini-game as Alone in the Dark, so try to clump up your wounded fighters and have them together. Once again, simply not driving back an enemy may deny them two glory.
Realmstone Raiders
Hoarder’s Hovel: A really interesting objective that only requires you to hold one very specific treasure with a specific bounty fighter. Pay attention to which fighter is on which treasure through the round. Make it harder for them to score it. You can also snag Treasures 1 and 2 to limit options. Lastly, if they only have one fighter at a specific bounty value (I’m thinking 4 fighter warbands), target them to remove another option.
Roused Violence: If they can get 5 cards raided, there’s no counterplay. If you’re playing Pillage and Plunder, you’re going to hand this to them and that’s ok. Otherwise, try to stem the tide of delved treasure tokens as per my comments on Torn Landscape.
Certain Aggression: See Denial. And also 2 glory.
The End Phase
So there’s my thoughts! I will say that it usually is not worth it to sacrifice your scoring to counterplay, unless the glory differential is that high that it would make sense to. But what are your thoughts? What have I missed? I’m on the Discords as Matt ~ Set The Tempo, or reach out to me at setthetempoblog@gmail.com.
I did want to give a huge shout out to everyone who came to the Alberta Classic! It was a really fun event and I was so happy to meet everyone. To those who travelled, it means a lot to meet people from other cities. It takes a time and monetary commitment to travel for our game, which is amazing to see. Take care and make sure to set your own tempo!